@healingchoice.org Google Workspace account. This support center provides definitive clinical and administrative documentation for all EHR modules.Portal Navigation & Workspace Layout
The EHR interface is divided into primary clinical workflows, administrative management, and real-time communication tools:
| Navigation Item | Route / Location | Primary Purpose & Features |
|---|---|---|
| Calendar | /calendar | Main home base. Day, Week, and Month views synced directly with your Google Calendar. Includes Privacy Mode toggle, Show External Events toggle, appointment flyouts, and one-click Google Meet launch. |
| Clients | /clients | Searchable directory of all active and discharged clients. Manage individual charts, family units, treatment plans, measures, billing ledgers, and files. |
| Supervision | /supervision | Supervisor review queue. Notes authored by associates and interns route here automatically for countersignature, approval, or revision feedback. |
| Sup. Hours | /supervision-hours | Supervision hours tracker. Log and monitor clinical contact hours and direct supervision hours towards full licensure. |
| Analytics (Admin) | /analytics | Practice pulse, revenue charts, filed claims volume, note compliance metrics, and interactive drilldown panels. |
| Billing (Admin) | /billing | Live billing ledger, automated charge queue, batch EDI 837 claim files, and Electronic Remittance Advice (835 ERA) reconciliations. |
| Reports (Admin) | /reports | Comprehensive reporting hub: Annual Financials, Clinician Snapshots, Income Allocation, Attendance, and Compliance reports. |
| Settings | /settings | Manage your Google Calendar sync, weekly Availability schedules, blackout periods, and custom Clinical Note Templates. |
| Activity Log | /audit-log | HIPAA security audit trail logging authentication, record access, signature timestamps, and chart exports. |
| Claims (Admin) | /admin/claims | Interactive CMS-1500 visual form editor, clearinghouse submission queue, and Availity real-time eligibility checks. |
| Changelog (Admin) | /admin/changelog | System release history, recent bug fixes, and continuous deployment version log. |
| Header Search & Drawers | Top Navigation Bar | Global client search (Search clients by name...), unread direct Messages drawer, and Booking Requests intake drawer. |
Clients & Intake
Clinical Documentation & Session Notes
Billing, Scheduling & Practice Operations
Logging into the Portal
-
1Go to portal.healingchoice.org
Open any browser and navigate to
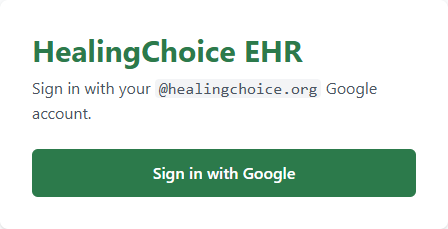
portal.healingchoice.org. You will see the HealingChoice sign-in screen. -
2Click "Sign in with Google"
Use your
@healingchoice.orgGoogle account only. Personal Gmail addresses will not be granted access. If you do not have a@healingchoice.orgaccount yet, contact Dr. Tanner. -
3You land on the Calendar page
The Calendar at
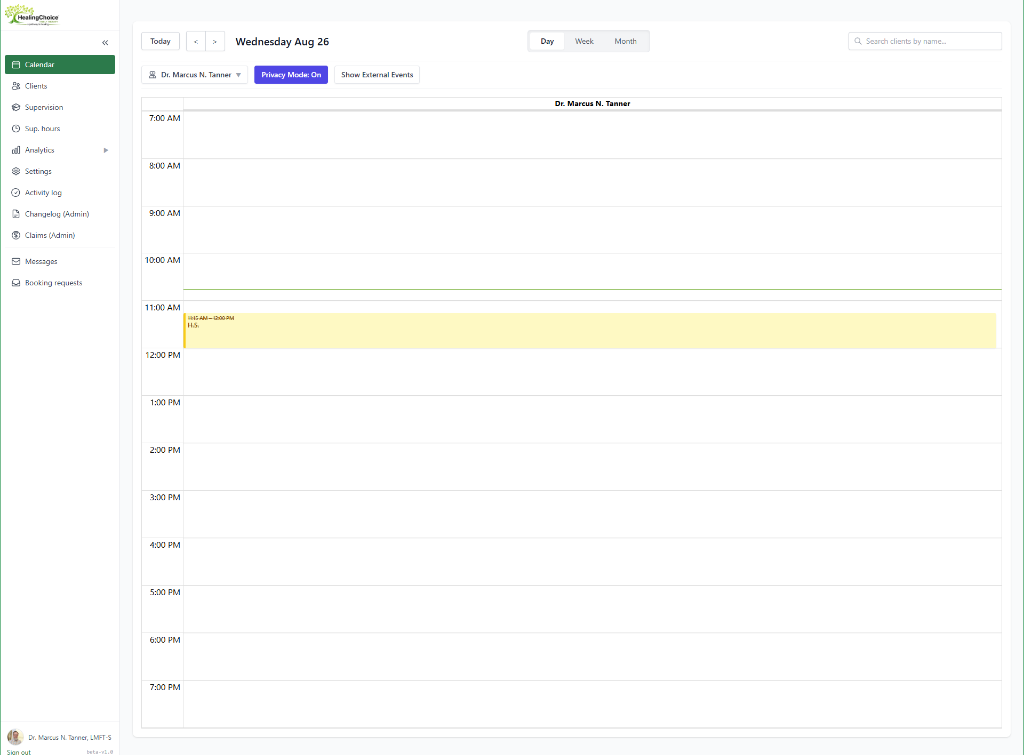
/calendaris your main landing page after login. It shows your appointments for the current week, synced automatically from Google Calendar via domain-wide delegation.
Essential Navigation & Header Tools
-
1Calendar (your home base)
Shows your full week of appointments synced directly from your Google Calendar. Click any appointment block to open an interactive flyout showing client contact details, session billing status, and direct buttons to open/create the clinical note or launch Google Meet.
-
2Privacy Mode (On / Off)
Located in the top header of the Calendar. When toggled ON, all client names and identifying details are obscured on your calendar screen with anonymized initials/blocks. Always toggle Privacy Mode ON when sharing your screen during clinical consultations or working in visible office areas.
-
3Global Client Search
Located in the top-right header (
Search clients by name...). Type any client's first or last name to immediately navigate to their chart without browsing the full client list. -
4Supervision & Supervision Hours
Associates and interns: your signed notes land in
/supervisionawaiting supervisor countersignature. Use/supervision-hoursto log and verify clinical contact and direct supervision hours towards full licensure. -
5Settings
Manage your Google Calendar sync connection, set weekly recurring Availability for online booking, add blackout dates, and customize clinical note templates under
/settings. -
6Booking Requests & Direct Messages
Click the inbox drawer in the header to view unread direct client messages, or check the booking drawer for newly submitted client appointment requests.
-
7AI Help Widget ("Ask AI")
Located in the bottom-right corner of every portal page. Click the widget anytime to ask quick questions about EHR workflows, policy requirements, or clinical documentation rules.
Adding a New Client
-
1Go to the Clients page
Click Clients in the left sidebar. This opens the client list at
/clients. -
2Click "+ New Client"
The button is in the upper right of the Clients page. This opens the new client form at
/clients/new. -
3Fill in the required fields
Required fields are marked with an asterisk (*). At minimum you need: first name, last name, date of birth, email address, phone number, and insurance (or select "Self-pay / Cash").
-
4Assign the clinician
Select the clinician who will be seeing this client. Admin can assign any clinician; clinicians adding their own client will be auto-assigned.
-
5Save — a client code is auto-assigned
Click Save. The portal immediately creates the client record and assigns a unique client code in the format
HC-YYYY-NNN(e.g.,HC-2026-047). This code appears on all notes and claims for this client.
Finding a Client
-
1Click Clients in the sidebar
This opens the full client list at
/clients. Your active clients are listed by default. -
2Use the search bar to find the client
Type any part of the client's name in the search bar at the top of the Clients page. Results filter in real time. You can also search by client code (e.g.,
HC-2026-047). -
3Click the client's name to open their detail page
This opens
/clients/:id— the client detail page. All information and actions for this client are here.
Client Detail Page Tabs
The client detail page has 7 dedicated clinical and administrative tabs across the top:
| Tab | Contents & Workflows |
|---|---|
| Overview | Client demographics, date of birth, contact details, emergency contacts, assigned clinician, insurance policy numbers, and client ID code. Includes one-click quick actions to administer measures or invite to portal. |
| Notes | All clinical session notes (Progress Notes, Intake Assessments, Consultation Notes). Displays draft, pending supervisor, and signed statuses. Use + New Note to launch the note editor. |
| Treatment Plans | Active and historical treatment plans with goals, objectives, interventions, and primary/secondary ICD-10 diagnostic codes. Use + New Treatment Plan to create or update. |
| Measures | Standardized outcome assessments (RSES, PHQ-9, GAD-7, Restore Marriage Checkup). Track baseline scores, symptom reduction curves, and longitudinal clinical outcomes. |
| Billing | Complete client financial ledger, generated invoices, Stripe card-on-file status, and CMS-1500 insurance claim records. Clinicians can add cash/copay payments directly. |
| Forms & Files | Uploaded clinical documents, scanned records, and sent/completed digital intake questionnaires. Click any completed questionnaire to view structured client responses. |
| Messages | Direct, HIPAA-compliant secure messaging channel between the clinician and the client through the client portal. |
1. Creating a Family or Couple Unit
-
1Navigate to Clients
From the main menu, go to
/clients. Click the "+ New Family / Couple" button in the top action bar. -
2Enter Family Group Details
Give the family unit a descriptive name (e.g., "Smith, John & Mary Couple" or "Davis Family") and select the primary relationship type (Couples, Marriage, Family, Parent-Child).
-
3Add or Link Members
You can either create brand new client records during family creation or link existing individual clients already registered in your caseload.
2. Linking Existing Clients into a Family
-
1Open the Family View
Navigate to
/families/:idfrom the client's overview page or the Families filter in your client directory. -
2Click "Link Member"
Search for the existing client's name and assign their family role (e.g., Primary Insured, Partner, Spouse, Child, Guardian).
-
3Confirm Shared Billing Responsible Party
Designate which family member is the primary guarantor or insurance subscriber for joint claims (CPT 90847 / 90846).
3. Documenting Relational Sessions
When authoring a progress note for a family or couples session:
-
1Select CPT 90847 (Family/Couple with Client Present)
Ensure the note reflects relational dynamics, interactional patterns, systemic interventions, and partner communication goals.
-
2Confidentiality Safeguards
Joint notes are stored in the relational family chart. Individual therapy notes (CPT 90837/90834) remain strictly confidential within that specific person's individual chart and are not visible to partners.
1. Creating a Treatment Plan
-
1Open Client Chart → Treatment Plans Tab
Navigate to
/clients/:idand click the Treatment Plans tab. Click "+ New Treatment Plan". -
2Select Diagnoses with the ICD-10 Picker
Click the diagnosis search box. Type keywords (e.g., "major depression", "generalized anxiety", "adjustment disorder", or "F41.1"). Select primary and secondary diagnoses.
-
3Define Clinical Goals & Measurable Objectives
Write clear, behavioral SMART goals (Specific, Measurable, Attainable, Relevant, Time-bound). Specify baseline frequencies and target frequencies (e.g., "Reduce panic episodes from 4x/week to 0-1x/week within 90 days").
-
4Specify Modalities & Interventions
Document evidence-based clinical modalities utilized (e.g., CBT cognitive restructuring, Gottman Method sound relationship house, Emotion-Focused Therapy, EMDR bilateral stimulation, Narrative Therapy).
-
5Sign & Finalize
Review the plan with the client, obtain verbal consent/collaboration, and apply your electronic signature. The plan will now automatically inform all subsequent session notes.
Available Clinical Measures in the EHR
| Measure | Domain / Focus | Scoring & Clinical Thresholds |
|---|---|---|
| PHQ-9 | Patient Health Questionnaire (Depression) | 0-4: Minimal, 5-9: Mild, 10-14: Moderate, 15-19: Moderately Severe, 20-27: Severe. *Item 9 triggers risk assessment. |
| GAD-7 | Generalized Anxiety Disorder 7-item Scale | 0-4: Minimal, 5-9: Mild, 10-14: Moderate, 15-21: Severe anxiety. |
| RSES | Rosenberg Self-Esteem Scale (10 items) | Scores < 15 indicate significantly low self-esteem; 15-25 normal range. |
| Restore Marriage Checkup | Relational health, intimacy, communication & conflict | Multi-dimensional relational dashboard generated for couples in marriage enrichment/therapy. |
How to Administer a Measure
-
1Open Client Chart → Measures Tab
Click "Administer Measure" on the client's overview or Measures tab.
-
2Choose Delivery Method
In-Session: Complete directly with the client on your screen.
Send to Client Portal: Sends an automated secure prompt to the client's portal dashboard / email. -
3Review Score Graphs & Notes
Scores auto-calculate and populate an interactive longitudinal progress chart. Clinicians can import the latest score directly into session notes.
Sending Intake Packets to a Client
-
1Open Client Record → Forms Tab
Navigate to
/clients/:idand select the Forms tab. -
2Click "Send Intake Packet"
Select standard intake forms: Consent for Treatment, HIPAA Privacy Notice, Financial Agreement, and the Comprehensive Adult/Child Intake Questionnaire.
-
3Client Completes Form Online
The client receives an email notification with a secure link. They complete all required fields and apply their digital signature on any mobile phone, tablet, or computer.
-
4Review Responses in the Form Response Viewer
Once submitted, the status updates to
Completed. Click the form to view full structured responses, medical history, and emergency contacts in the built-in viewer.
| Subdomain | Audience | Core Functions |
|---|---|---|
| portal.healingchoice.org | Clinicians & Staff | EHR system, calendar management, chart documentation, supervision, and billing. |
| client.healingchoice.org | Active Clients | Secure portal dashboard: view upcoming appointments, complete assigned forms, review invoices/receipts, and send direct messages to therapist. |
| booking.healingchoice.org | New Prospective Clients | Public online booking widget (/book) and public digital intake completion (/intake/:token). |
Key Client Portal Features
-
1Passwordless Magic Link Login
Clients sign in using their registered email. A secure 6-digit verification code or magic link is emailed to them, eliminating forgotten password lockouts.
-
2Appointment Reminders & Telehealth Access
Clients see their confirmed upcoming appointments and can launch Google Meet video sessions directly from their portal home screen.
-
3Billing & Superbills
Clients can download itemized invoices, payment receipts, and superbills for out-of-network insurance reimbursement.
-
4Secure Direct Messaging
Clients can send non-emergency administrative or clinical messages directly into the clinician's EHR inbox drawer.
Creating a New Session Note
-
1Open the client's detail page
Go to Clients, find the client, and click their name. This opens
/clients/:id. -
2Click the Notes tab
The Notes tab shows all previous notes for this client — drafts, signed notes, and any notes returned for revision.
-
3Click "+ New Note"
This opens the note editor at
/clients/:id/notes/new. -
4Select a template from the dropdown
Choose the note template that matches the session type (e.g., Individual Therapy Note, Intake Evaluation, Group Note). The template pre-populates the note structure with the correct sections.
-
5Select the appointment this note is for
Link the note to the corresponding appointment from the dropdown. This pulls in the date, time, and session type automatically.
-
6Fill in the note content
Complete all required fields (marked with *) and write your clinical narrative. The note auto-saves every few seconds — you will see a "Saved" indicator in the editor.
AI Note Generation (Optional)
The note editor includes an AI assist feature powered by Vertex AI. If you record your session or have a transcript, you can use the "Generate with AI" button to generate a draft note from the transcript. Always review and edit AI-generated content before signing — you are clinically responsible for everything in the note.
Clinical Fields (Required)
90837F41.1Telehealth Notes
If the appointment was a telehealth session, the session type will reflect this automatically when you link the appointment. The portal sets place of service to 02 and applies modifier 02 on the claim automatically — you do not need to do anything extra. See the Telehealth Sessions page for full details.
1. Using the AI Coach in the Note Editor
-
1Write your initial clinical draft or bullet points
Enter your session observations, client disclosures, and clinical interventions in the note fields as normal.
-
2Click "AI Coach" (or "Polish Documentation")
The AI Coach analyzes your text and checks for:
• Clear medical necessity linking interventions to the ICD-10 diagnosis.
• Active, evidence-based modality verbs (e.g., "facilitated cognitive reframing" vs. "talked about feelings").
• Objective behavioral observations in the Mental Status and Client Response sections. -
3Review, Edit, and Apply Suggestions
The AI displays suggested refinements side-by-side. You can accept specific sentences, modify suggestions, or dismiss them entirely.
2. In-Portal AI Help Widget ("Ask AI")
-
1Open the Widget Anytime
Click the "Ask AI" pill in the bottom-right corner of the EHR interface.
-
2Instant Answers to Workflow & Coding Questions
Ask questions such as: "What CPT code do I use for a 45-min family session?", "How do I submit a note to my supervisor?", or "Where do I set up recurring availability?"
| CPT Code | Session Type | Duration | Notes |
|---|---|---|---|
| 90791 | Psychiatric diagnostic evaluation (Intake) | 60 min | Use for the initial intake/evaluation session only — the first time meeting a new client for a diagnostic evaluation. |
| 90837 | Individual therapy | 60 min | Most common code. Session must be at least 53 minutes. One client, therapeutic work. |
| 90834 | Individual therapy | 45 min | Use when session is 38–52 minutes of face-to-face therapy time. |
| 90832 | Individual therapy | 30 min | Use when session is 16–37 minutes. Less common — check with Dr. Tanner before using regularly. |
| 90847 | Family/couples therapy with patient present | 50 min | The identified patient must be present. Use for couples therapy or family therapy where the patient participates. |
| 90846 | Family therapy without patient present | 50 min | Rare. Use only when meeting with family members without the identified patient present. |
| 90853 | Group therapy | 90 min | One note and one billing line per group member per session. Each participant has their own claim. |
Using the ICD-10 Picker
The note editor has a built-in ICD-10 picker. You do not need to memorize codes — use the picker to search by description or code prefix.
-
1Click the ICD-10 field in the note editor
The Primary Diagnosis field opens a searchable picker panel.
-
2Type a description or code to search
Examples: type "anxiety" to find anxiety-related codes, or type "F41" to see all F41.x codes. Results appear instantly.
-
3Save favorites for codes you use often
Click the star icon next to any code to add it to your favorites. Your favorites appear at the top of the picker every time you open it, saving time for repeat diagnoses.
-
4Select the most specific billable code
Always use the most specific code available for the client's presentation. Unspecified codes (e.g., F43.10 instead of F43.12) are valid if the presentation doesn't fit a more specific code, but avoid over-using them.
Common Diagnosis Codes at HealingChoice
| Code | Description | Common Use |
|---|---|---|
| F41.1 | Generalized Anxiety Disorder | Pervasive worry, tension, difficulty controlling anxiety |
| F41.0 | Panic Disorder | Recurring panic attacks |
| F40.10 | Social anxiety disorder, unspecified | Fear of social situations, performance anxiety |
| F32.1 | Major depressive disorder, single episode, moderate | MDD, first episode, moderate severity |
| F33.1 | Major depressive disorder, recurrent, moderate | MDD with prior episodes, current moderate |
| F43.10 | Post-traumatic stress disorder, unspecified | PTSD without specifying acute or chronic |
| F43.12 | Post-traumatic stress disorder, chronic | PTSD lasting more than 3 months |
| F43.20 | Adjustment disorder, unspecified | Stress response to an identifiable stressor |
| F43.23 | Adjustment disorder with mixed anxiety and depressed mood | Common in life transitions, grief, loss |
| Z63.0 | Problems in relationship with spouse or partner | Secondary code for couples work — never use as primary |
| F60.3 | Borderline personality disorder | BPD diagnosis |
| F90.9 | ADHD, unspecified type | ADHD without specifying presentation type |
02 and applies modifier 02 on the claim — you do not do anything extra.Scheduling a Telehealth Appointment
-
1Go to the Calendar page
Click Calendar in the sidebar to open
/calendar. -
2Click an empty time slot or use "+ New Appointment"
Either click directly on the calendar at the desired time, or use the appointment creation flyout. This opens the New Appointment dialog.
-
3Select "Telehealth" as the appointment type
In the appointment type dropdown, choose Telehealth. The portal automatically generates a Google Meet link and includes it in the calendar event and any reminder messages sent to the client.
-
4Fill in client, clinician, date, time, and duration — then save
Complete the remaining fields. The appointment appears on the calendar and on the client's SMS reminder (sent automatically via Twilio).
Writing the Telehealth Note
-
1Open the client's Notes tab and click "+ New Note"
Follow the standard note creation process.
-
2Link the note to the telehealth appointment
When you select the appointment in the note editor, the system recognizes it as telehealth and applies the correct billing settings automatically.
-
3Note the platform in your clinical narrative (best practice)
In your session notes, briefly document: "Session conducted via HIPAA-compliant video platform (Google Meet)." This is a documentation best practice.
Note Statuses Explained
Every note in the portal moves through a defined set of statuses:
| Status | What It Means |
|---|---|
| draft | Note is being written. Auto-saves continuously. Not yet submitted. |
| unsigned | Note has been saved but not yet signed by the clinician. |
| pending_countersign | Clinician has signed; waiting for supervisor countersignature. Applies to associates and interns only. |
| returned_for_revision | Supervisor has returned the note with feedback. Clinician must revise and re-sign. |
| signed | Fully signed (and countersigned if required). Claim has been auto-created. |
| amended | An addendum has been added to a signed note. The original signed note is preserved. |
How to Sign a Note
-
1Open the note in the note editor
From the client's Notes tab, click the draft note to open it in the editor at
/clients/:id/notes/:noteId/edit. -
2Fill in all required fields
All fields marked with * must be complete. Required: template, linked appointment, CPT code, primary ICD-10 diagnosis, and all clinical narrative sections. The "Sign & finalize" button stays grayed out until all required fields are filled.
-
3Click "Save Draft" to save without signing (optional)
The green outline button labeled Save Draft saves your current work without finalizing. Use this if you need to step away and come back.
-
4Click "Sign & finalize" when ready
The solid green button labeled Sign & finalize locks the note and submits it. You will be asked to confirm. Once signed, the note cannot be edited — only amended.
-
5A PDF is generated and a claim is auto-created
Immediately after signing, the portal generates a signed PDF of the note (accessible via the View Signed PDF button). For insurance clients, a claim is auto-created in the billing pipeline. You will see a "View claim · HC-XXXX-XXX" button appear on the note.
After Signing — Available Actions
| Button | What It Does |
|---|---|
| View Signed PDF | Opens the generated PDF of the signed note. Available immediately after signing. |
| + Addendum (purple) | Adds an addendum to the signed note without altering the original. Use this for corrections or additional documentation after signing. |
| View claim · HC-XXXX-XXX | Opens the auto-created claim for this session. Available for insurance clients after signing. |
| Create claim manually | Fallback option if the auto-claim did not run. Contact admin before using this. |
The Billing Pipeline
-
1You sign the session note ("Sign & finalize")
This is the trigger for the entire billing workflow. The note must be fully signed (and countersigned for associates/interns) before billing begins.
-
2A claim is auto-created in the portal
Immediately after signing, the portal creates a claim record. You will see the "View claim · HC-XXXX-XXX" button appear on the note. The claim pulls the CPT code, ICD-10 codes, client insurance info, clinician NPI, and date of service from the note.
-
3Claim is submitted to Office Ally via SFTP
The portal generates an X12 837P EDI file and transmits it to Office Ally (our clearinghouse) via a secure SFTP connection. Office Ally routes the claim to the appropriate insurance carrier (BCBS, United/Optum, Magellan, Cigna, Aetna, or Curative).
-
4Insurance processes the claim and sends an ERA
The insurance carrier processes the claim and returns an Electronic Remittance Advice (ERA) indicating the amount paid, denied, or adjusted. The ERA is received and recorded in the portal automatically.
-
5Payment is posted and the claim is closed
Admin reviews the ERA and marks the claim as paid. The full billing history is visible in the client's Billing tab and on the admin Billing page (
/billing).
1. Visual CMS-1500 Claim Form Editor
-
1Access Claims via /admin/claims
Admins can view all generated claims across the practice. Click any claim ID to open the visual CMS-1500 editor at
/admin/claims/:id/edit. -
2Auto-Populated Red-Box CMS-1500 Grid
The system maps all client demographics (Box 1-13), diagnosis pointers (Box 21), service line items with CPT & modifiers (Box 24A-J), clinician NPI & taxonomy (Box 24J/33), and facility billing data automatically.
-
3Real-Time Form Validation
The editor flags missing modifiers, unmapped diagnoses, or mismatched insurance IDs before the EDI file is compiled, preventing rejections.
2. Availity Real-Time Eligibility Verification
-
1Run Instant 270/271 Inquiries
From any client's Overview or Billing tab, click "Check Eligibility".
-
2Instant Co-Pay & Deductible Status
Returns live active coverage status, in-network/out-of-network deductible balances, copay/coinsurance amounts, and prior-authorization requirements for major payers (BCBS, Aetna, Optum/UHC, Cigna).
3. Clearinghouse Batches & ERA 835 Auto-Posting
| Feature | Workflow & Details |
|---|---|
| EDI 837P Generation | Claims are compiled into HIPAA-standard X12 837 Professional batch files and transmitted to Office Ally via secure SFTP. |
| ERA 835 Auto-Posting | Electronic Remittance Advice files are retrieved automatically. Payments, contractual write-offs, and client copay balances post directly to the ledger. |
| Charge Queue | Automated queue at /billing/charges for processing client copays, deductible balances, and self-pay fees via Stripe. |
What "Returned for Revision" Means
For associates and interns: after you sign a note, it goes to your supervisor's Supervision queue with a status of pending_countersign. If your supervisor finds an issue — a missing field, incorrect code, or clinical documentation concern — they click "Return for revision" (amber button) with written feedback.
When a note is returned:
-
1You receive a notification
The portal sends you an in-app notification and (depending on your settings) an email. The note appears with a red or amber banner in your Notes list for that client.
-
2The note status changes to "returned_for_revision"
The note is unlocked and returned to an editable state so you can make corrections. The supervisor's feedback is visible at the top of the note in the editor.
-
3No claim has been submitted yet
Claims are only created after a note is fully signed and countersigned. A returned note has no claim in process — nothing to cancel or void.
Common Reasons Notes Are Returned
| Reason | What to Fix |
|---|---|
| Incorrect CPT code | Review the CPT Code Reference. Select the correct code and re-sign. |
| Missing or vague clinical content | Read supervisor feedback. Expand the relevant section with more specific clinical documentation. |
| Wrong ICD-10 code | Use the ICD-10 picker to find the correct, most specific code. Confirm with Dr. Tanner if unsure. |
| Missing required field | Find the field marked with * that is empty and fill it in before re-signing. |
| Note linked to wrong appointment | Re-select the correct appointment from the dropdown. Check the date matches the session. |
Steps to Revise and Re-Sign
-
1Open the returned note
Go to the client's Notes tab. Click the note showing the "returned_for_revision" status (shown with an amber or red indicator). This opens the note editor at
/clients/:id/notes/:noteId/edit. -
2Read the supervisor's feedback at the top of the note
The supervisor's return comments are displayed in a banner at the top of the editor. Read them carefully before making any changes.
-
3Make the requested corrections
Edit the relevant fields or narrative sections. Use the CPT Code Reference or ICD-10 picker pages if you need to look up the correct values. If the feedback is unclear, contact your supervisor before guessing.
-
4Click "Sign & finalize" again
When corrections are complete, click Sign & finalize. The note moves back to
pending_countersignstatus and reappears in your supervisor's queue. -
5Your supervisor countersigns — the claim is created
Once the supervisor clicks Countersign & finalize, the note moves to
signedstatus and the billing claim is auto-created.
Insurance Carriers Accepted
| Insurance Carrier | Associates (LMFT-A, LPC-A) | Licensed (LMFT, LPC) | Interns |
|---|---|---|---|
| BCBS (Blue Cross Blue Shield) | ✓ In-network | ✓ In-network | Cash only — $50 |
| United Healthcare / Optum | ✓ In-network | ✓ In-network | Cash only — $50 |
| Magellan | ✓ In-network | ✓ In-network | Cash only — $50 |
| Cigna | ✓ In-network | ✓ In-network | Cash only — $50 |
| Aetna | ✓ In-network | ✓ In-network | Cash only — $50 |
| Curative | ✓ In-network | ✓ In-network | Cash only — $50 |
Fee Schedule
| Clinician Level | Intake / Initial Eval | Ongoing Sessions | Pay Type |
|---|---|---|---|
| Student Intern | $50 | $50 | Cash pay only |
| Associate (LMFT-A, LPC-A) | $100 | $80 | Insurance or cash |
| Licensed (LMFT, LPC) | $200 | $175 | Insurance or cash |
/calendar serves as the practice group view and syncs directly with each clinician's personal Google Calendar in real time.Key Calendar Features
-
1Privacy Mode (On / Off)
Click the "Privacy Mode: On/Off" button in the calendar toolbar. When activated, client names are masked with confidential initials and session types are genericized. Always turn Privacy Mode ON when presenting your screen during supervision, consultations, or working in shared areas.
-
2Show / Hide External Events
Click "Show External Events" to display non-client blocks from your linked personal Google Calendar (such as personal doctor visits or meetings) in ghosted grey blocks. This prevents double-booking without exposing event titles to clients.
-
3Day, Week, and Month Views
Switch seamlessly between Day view (hour-by-hour detail), Week view (default schedule overview), and Month view (long-range planning).
-
4Interactive Appointment Flyout
Click any session block to open the flyout. From here you can:
• View client contact numbers & emergency contacts.
• Click "Join Video Call" to launch Google Meet.
• Click "Open Note" or "Create Note" to jump directly to clinical documentation.
• Update attendance status (Show, Client Cancel, Late Cancel, No Show, Clinician Cancel).
Creating a New Appointment
-
1Go to the Calendar page
Click Calendar in the sidebar to open
/calendar. -
2Click an empty time slot on the calendar
Click directly on the calendar at the desired date and time. This opens the New Appointment flyout. Alternatively, click an existing appointment to open its flyout, then click "+ New Appointment" from there.
-
3Select the client
Start typing the client's name in the client field. Choose from the dropdown — the client must already exist in the portal. If the client is new, add them first (see New Client Assignment).
-
4Select the clinician
Choose the clinician for this session. Clinicians will see themselves selected by default.
-
5Select the appointment type
Choose from: Individual, Family, Couples, Group, Telehealth, or Intake. This sets the session type that flows into the note and billing claim.
-
6Set the date, time, and duration
Confirm the date and time are correct. Set the duration based on the planned session length (30, 45, 50, 60, or 90 minutes depending on session type).
-
7Save the appointment
Click Save. The appointment appears on the portal calendar and on your Google Calendar automatically. An SMS reminder is sent to the client via Twilio before the session.
Marking a Cancellation or No-Show
-
1Click the appointment on the Calendar page
Click the appointment block to open the appointment flyout panel.
-
2Find the status options in the flyout
The flyout shows the current appointment status and a dropdown or set of buttons to change it.
-
3Select the correct cancellation type
Choose from the following statuses:
client_cancel — client cancelled with adequate notice (no late fee)
late_cancel — client cancelled within the late cancellation window (late fee may apply)
no_show — client did not attend and gave no notice (no-show fee may apply)
clinician_cancel — clinician cancelled the appointment (no client fee) -
4Save the status change
The appointment status updates. The billing pipeline is notified — cancelled and no-show appointments do not generate insurance claims. Admin will handle any applicable fees.
Rescheduling an Appointment
-
1Mark the original appointment with the correct status
If the original session did not happen, mark it as
client_cancel,late_cancel, orno_showas appropriate. -
2Create a new appointment at the rescheduled time
Click the new time slot on the calendar and create a fresh appointment. Do not edit the original appointment's date and time directly — this can break the link to any associated note.
-
3Confirm the new time with the client
The portal will send an automatic SMS reminder before the rescheduled appointment. For same-day reschedules, contact the client directly to confirm.
Emergency Numbers
| Resource | Number | When to Use |
|---|---|---|
| Emergency / Immediate Danger | 911 | Any immediate risk to life — yours or the client's |
| 988 Suicide & Crisis Lifeline | 988 (call or text) | Client is in crisis but not in immediate danger; give this to clients as a between-session resource |
| Dr. Marcus Tanner | (806) 319-7400 | Contact immediately after any crisis event, or when unsure how to proceed |
During a Session — Crisis Steps
-
1Conduct a safety assessment
Ask directly about suicidal or homicidal ideation, plan, means, and intent. Document the client's responses verbatim in your session note.
-
2If immediate danger — call 911
Call 911 immediately and stay on the line with the client if safe to do so. For telehealth sessions: keep the video call open on one device while calling 911 on another. Do not wait for supervisor approval before calling 911.
-
3Contact Dr. Tanner immediately
Call or text Dr. Tanner at (806) 319-7400. Do not wait until after the session ends. If you cannot reach him, contact your direct supervisor.
-
4Develop a safety plan with the client if not in immediate danger
Complete a crisis safety plan with the client. Document the safety plan in the session note — include warning signs, coping strategies, support contacts, and the client's agreement to the plan.
-
5Document everything in the session note
In the portal note editor, document the full safety assessment findings, your clinical interventions, the safety plan content, and every person you notified and when. The note should stand alone as a complete clinical record of the crisis event.
Between-Session Crisis Contact
-
1Direct the client to 988 or 911
If a client contacts you in crisis between sessions, direct them immediately to call or text 988 (Suicide & Crisis Lifeline) or go to the nearest emergency room if in immediate danger.
-
2Notify Dr. Tanner
Contact Dr. Tanner at (806) 319-7400 regardless of outcome. Text is acceptable for non-emergency notifications; call if the situation is urgent or unresolved.
-
3Document the contact in a between-session note
In the portal, open the client's Notes tab and create a new note documenting the date, nature of the contact, your response, and who was notified. Link it to the closest scheduled appointment or create a standalone contact note.
1. Supervision Queue Workflow (/supervision)
-
1Associate / Intern Signs Note
Complete your session note and click "Sign & finalize". The note is legally signed by you and immediately enters
pending_countersignstatus. -
2Supervisor Review in /supervision
Supervisors see all pending notes grouped by supervisee with unread indicators and timestamps. Clicking a note opens the full clinical note and client history.
-
3Countersign or Return with Feedback
Approve: The supervisor clicks "Countersign Note", reviews the attestation statement, and applies their electronic signature. The note moves to
signedstatus and billing claims auto-generate.
Return for Revision: If clinical corrections or diagnostic clarifications are needed, the supervisor clicks "Return for Revision" and enters constructive feedback. The note unlocks in the associate's editor.
2. Supervision Hours Tracking (/supervision-hours)
Track your cumulative progress toward state board licensure requirements:
| Category | Description & Purpose |
|---|---|
| Direct Clinical Contact | Face-to-face therapy hours with individuals, couples, and families (logged automatically from completed signed sessions). |
| Individual Supervision | One-on-one clinical supervision hours with board-approved supervisor Dr. Marcus Tanner. |
| Group Supervision | Bi-weekly group case consultations and peer clinical review meetings. |
Building Address
All 6 offices are located in the same building:
Six individual offices inside the building — no suite numbers. Your assigned office number is listed in your clinician profile.
Offices
HealingChoice operates 6 individual offices within this building. Each clinician is assigned to a primary office. When creating appointments in the portal, select your office location — for telehealth appointments, no physical location is required.
| Office | Building | Notes |
|---|---|---|
| Office 1 | 7021 Kewanee Ave, Lubbock TX 79424 | |
| Office 2 | 7021 Kewanee Ave, Lubbock TX 79424 | |
| Office 3 | 7021 Kewanee Ave, Lubbock TX 79424 | |
| Office 4 | 7021 Kewanee Ave, Lubbock TX 79424 | |
| Office 5 | 7021 Kewanee Ave, Lubbock TX 79424 | |
| Office 6 | 7021 Kewanee Ave, Lubbock TX 79424 |
For parking, building access, or after-hours questions, contact Dr. Tanner at (806) 319-7400.
| Who | For What | How to Reach |
|---|---|---|
| Dr. Marcus Tanner | Clinical questions, crisis consultation, supervision, urgent portal issues, billing escalations | Call/text: (806) 319-7400 Email: marcus@healingchoice.org |
| Admin | Client records, insurance verification, scheduling support, booking requests, form issues, fee questions | Contact info to be added — ask Dr. Tanner |
Booking Requests
New client booking requests come in through the booking form and appear in the portal at /booking-requests (bell icon in the sidebar). Admin manages the booking request queue primarily. If you receive a direct referral or a client reaches out to you personally, contact admin to create the client record and schedule the first appointment.